Click on each equation number to find out more
* means multiply. It over comes the problem of confusing x with a variable called x.
00 Roundness
R = [Stereo Base Used] * V / n i
01 Brewster formula
B = n / 30
The widely quoted "one over 30 rule."
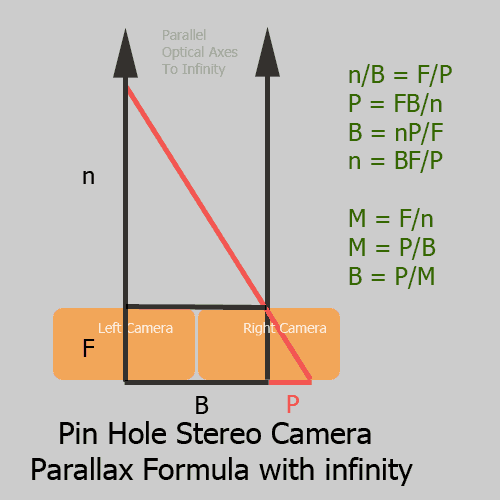
02 Pin-hole stereo camera formula with infinity in the picture
B = nP / F

A simple formula, where m is infinity.
03 Pin-hole with infinity: for easy use in a pocket calculator
B = 1200n / F
(natural units: B in mm, n in meters, F in mm)
Actually the same as (2), but in a form easily solved with a pocket calculator.
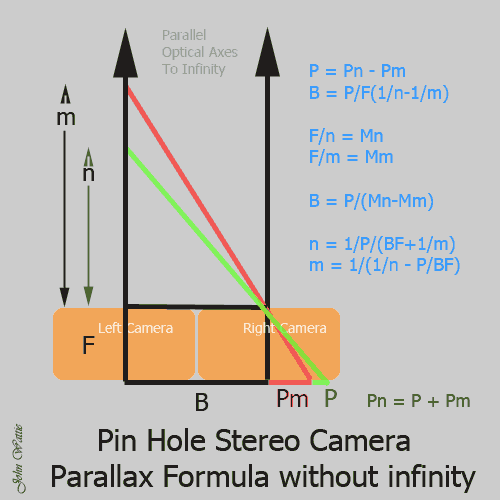
04 Pinhole stereo camera formula, with infinity not in the picture
B = P / (F * ( 1/n - 1/m ) )
This formula works very well for lens cameras too. It is the Bercovitz formula, without correction for changing the focus, which is an impossibility with a pinhole.

05 Bercovitz formula for lens cameras
B = P * ( mn / (m-n) ) * ( 1/F - ( m+n ) / 2mn )
P is usually 1.2 in 35mm equivalent photography and 1.2 is equivalent to a 1/30 rule or 2 degree rule, when using a standard lens.
Simplified Bercovitz formula:
when infinity is in the picture and the camera is focused at the hyperfocal distance:
B = n P / ( F - 1/2 )
Davis modification of the Bercovitz formula
If m < 2n
Then m = 2n
This was an arbitrary approximation by Davis and in my view is better replaced by the smaller of:
the base for perfect roundness, or the base for MAD.
Summary.
Concepts on this page are often found difficult to understand.
They are expanded and hopefully simplified when the number for each equation is clicked on the left.
The mathematics is simplified to the geometry of right angle similar triangles, avoiding matrices and analytical geometry, which real mathematicians use when discussing stereo. (The author makes no claims to mathematical ability beyond 5th form geometry from 60 years ago).
1) Viewing Distance plus Stereo Base determines ROUNDNESS
First decide how far away, in real or optical terms, your stereoscopic images are to be seen from.
Roundness or Stereoscopic Perceived Depth
is set by:
- Viewing Distance V
- Stereo Base B
- Distance to nearest object, n
- Interocular distance, i
Go here
to find the correct stereo base for undistorted roundness:
B = n * i / V
If you get roundness wrong, the 3D pictures can look too flat (cardboard) or too thick (hyper-plastic) instead of the desired orthoplastic (depth in true proportion to width). (Not everybody wants orthoplastic images: "photographic art" often changes the criteria).
Next worry about MAD
2) Stereoscopic Base during photography also determines MAD
Maximum Acceptable Disparity (MAD).
MAD varies with the person viewing the stereoscopic image. It is commonly set by the disparity (deviation) which is easily seen on a projected image. In professional practice, MAD is set by people who have poor stereoscopic perception for 3D images on a flat surface. If they are not catered for, they end up with eye strain and will never look at your 3D pictures again.
Disparity increases with magnification of the image.
Disparity is set by Parallax (P)
P = parallax, academically an angle, but generally expressed in mm, as the linear separation between homologous points on the two camera stereo receptors. (Commonly a maximum of 2 degrees, which becomes 1.2mm on a 35mm slide. It stays 1.2mm no matter what focal length lens is used, so the infinity to nearest object deviation stays constant in the viewing system or projected image. P only changes if the viewing distance is different from the standard 2 meters, (large screen movies), or experts are being catered for, who can handle bigger deviations).
B = stereo base (interaxial)
F = camera focal length (mm)
n = nearest distance imaged
m = maximum distance
stereo infinity: so far away that no parallax can be detected.
The best compromise stereo base is the smaller of the:
- base for perfect roundness or
- the base for MAD
(Maximum Acceptable Deviation. )
06 Frank Di Marzio formulae
B = P ( mn / (m-n )) * ( 1/F - 1/H )
H = 2mn / (m+n)
(H is the distance focused on for maximum depth of field,
or the hyperfocal distance.)
Di Marzio simple calculator formula:
If P is 1.2, the Di Marzio Equation simplifies hugely to:
B = H / 60
Unfortunately, modern digital camera lenses do not have H marked on them
Di Marzio stereo close-up formula:
B = n/15
or: n = 15B
The Di Marzio macro formula presumes the furthest object is only twice as far away as the nearest: m < 2n. Stereo macro photography usually follows this requirement.
06cDi Marzio magnification formula:
B = F * (1+ 1/M) / 15
where M is magnification in the camera. A useful formula, worked out by Frank at my request, where macro lenses have magnification marked on them. It only works if m < 2n, which is usual in macroscopic photography.
H = Hyperfocal distance.
R = Magnification in the camera. (Reproduction ratio)
Mn: Magnification at nearest point
Mm: Magnification at maximum distance.
If E is the lens extension beyond the infinity position:
R = E/F
(final image frame size)
(camera frame size
Magnification of the final image is:
R x (Frame magnification)
The Di Marzio equations depend on H, the hyperfocal distance.
Unfortunately, digital cameras use zoom lenses which do not have the hyperfocal ranges marked on them.
Digital cameras using full size sensors and fitted with "old" lenses can still use Di Marzio formulas.
07 PePax principle
How to handle a change in focal length. To maintain roundness, the base should increase proportional to the increased focal length. However that often causes a violation of Maximum Acceptable Deviation (MAD) unless the maximum distance (m) is reduced...
08 Jones et al
B = 2Z' tan a/2 dn N' / (W(Z' -N') + dn N' )
Follow the link to discover what the Jones equation is all about. So complex, it is best solved in a spreadsheet, which Jones et al provide.
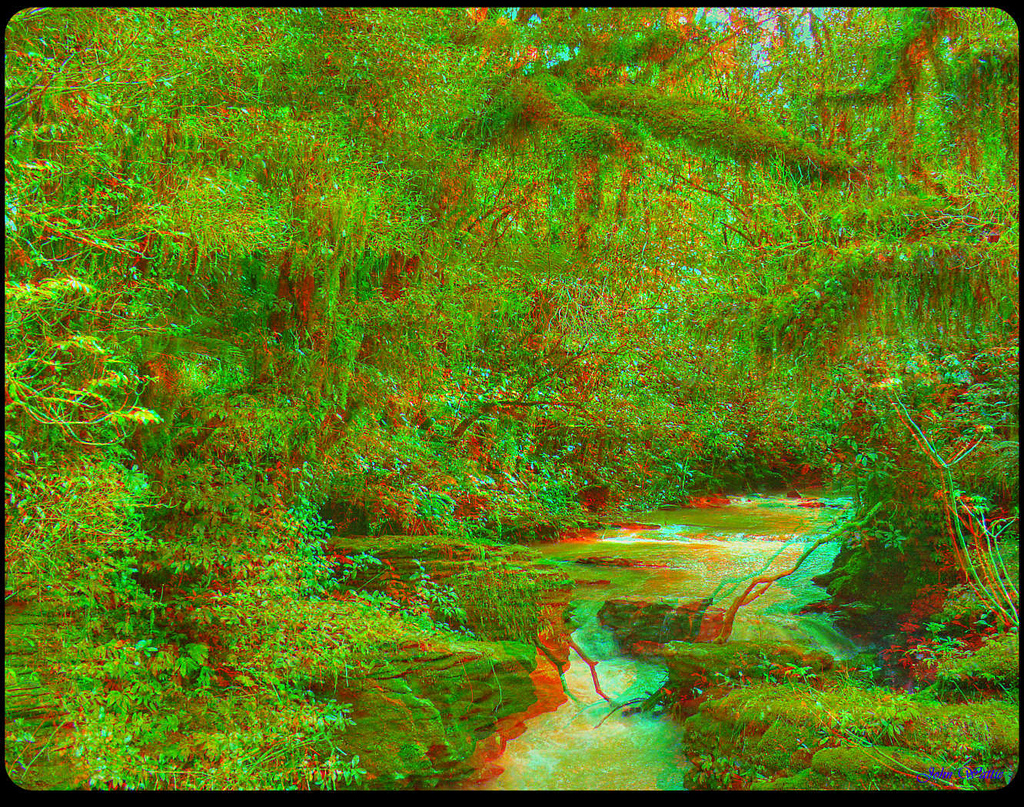
 Use anaglyph glasses to see in 3D.
